Best Propagation Dome Shape for Hydroponic Seedlings: Rounded Lids, Venting, and LED Spacing to Stop Damping‑Off
Common Mistakes: Why Your Domes Are Giving You Damping‑Off
Most growers blame nutrients, EC, or pH when seedling trays look patchy and weak. In a lot of hydroponic nurseries, the real problem is sitting right on top of the tray: a badly designed propagation dome.
If you are seeing any of this in your Kratky, DWC, or nursery trays:
- Seedlings in the corners lagging behind the middle
- Random cells collapsing from damping‑off while others look fine
- Domes fogged so hard you cannot see the plugs
- Condensation dripping straight onto cotyledons and stems
then you have a geometry and microclimate problem, not a recipe problem. Dome shape, vent layout, and LED spacing are driving uneven PPFD, pockets of stagnant air, and water dripping exactly where it does the most damage.
Terrarium research has made this very clear: curved, well‑vented enclosures distribute light and airflow more evenly than flat, boxy shapes, and they manage condensation better too, as noted in this guide. The same physics applies to hydroponic propagation domes sitting under LEDs.
This post is about fixing the hardware and geometry so your existing EC, pH, and oxygen strategy can actually shine.

Why These Problems Happen: Dome Shape, Vents, and LEDs Working Against You
1. Flat lids and sharp corners create dead zones
Most cheap humidity domes are simple rectangular boxes with flat tops and hard corners. Geometrically, this is the worst option for air and condensate behavior:
- Airflow: Warm humid air rises, hits the flat roof, loses energy, and stalls. Corners become low‑movement pockets where CO₂ drops and pathogens love to sit.
- Condensation: Water collects on the flat surface until droplets are large enough to fall directly down. If your tray is centered, those drops land right on cotyledons and stems.
- Light: LEDs mounted above hit the center almost perpendicularly but reach the corners at a steeper angle, often blocked partially by the dome lip. Result: middle cells get a higher PPFD, corners get less.
Terrarium studies show that rounded or domed shapes improve internal circulation and reduce stagnant pockets by letting air and moisture move along curves instead of slamming into flat planes, as highlighted in this analysis of terrarium shapes. That directly maps to propagation domes.
2. Poor vent design traps moisture and spores
Damping‑off pathogens thrive in warm, wet, stagnant air. Many domes make that environment by default:
- Single vent in the center of the roof, so corners barely exchange air.
- Vents that are too small or have only two positions (fully closed or fully open).
- No way to create cross‑flow across the tray, so CO₂ and humidity gradients build from one side to the other.
Guides on humidity domes for hydroponics and seed starting repeatedly stress that high humidity is useful only at the very beginning and must be reduced by opening vents after 5 to 7 days to avoid damping‑off and mold, as explained by Hydrobuilder and in this humidity dome vent guide. Without decent vent geometry, that graduation is impossible.
3. LED placement builds hot centers and cold edges
Propagation domes for hydroponics almost always sit under LEDs. When light bars or panels are placed too close or too narrow:
- PPFD peaks in the center cells, encouraging fast growth and higher transpiration there.
- Edges lag behind because the light footprint falls off faster than you expect.
- Heat at the center of the dome raises temperature and humidity locally, pushing condensation and pathogen pressure higher in the most illuminated spot.
LED manufacturers usually quote PPFD in a flat plane test, not considering the refractive and reflective effects of a clear plastic dome. Inside a dome, the geometry of the lid and the spacing of the LED to the plastic will push more light to some zones and less to others.
4. No condensate management means direct hits on stems
Inside any high‑humidity enclosure, condensation will form. The question is where it goes. Flat or lightly textured lids usually let droplets grow until gravity wins and they fall wherever they form. That often means straight down onto seedling stems.
Once you wet the stem and media surface repeatedly, damping‑off risk skyrockets. Seedling guides consistently recommend limiting surface saturation and venting domes when heavy condensation forms, as noted in this humidity dome tutorial and this dome guide. A lid that simply rains inside is doing the opposite.

How To Fix It: Design Rules For Domes, Vents, LEDs, And Drip‑Ridges
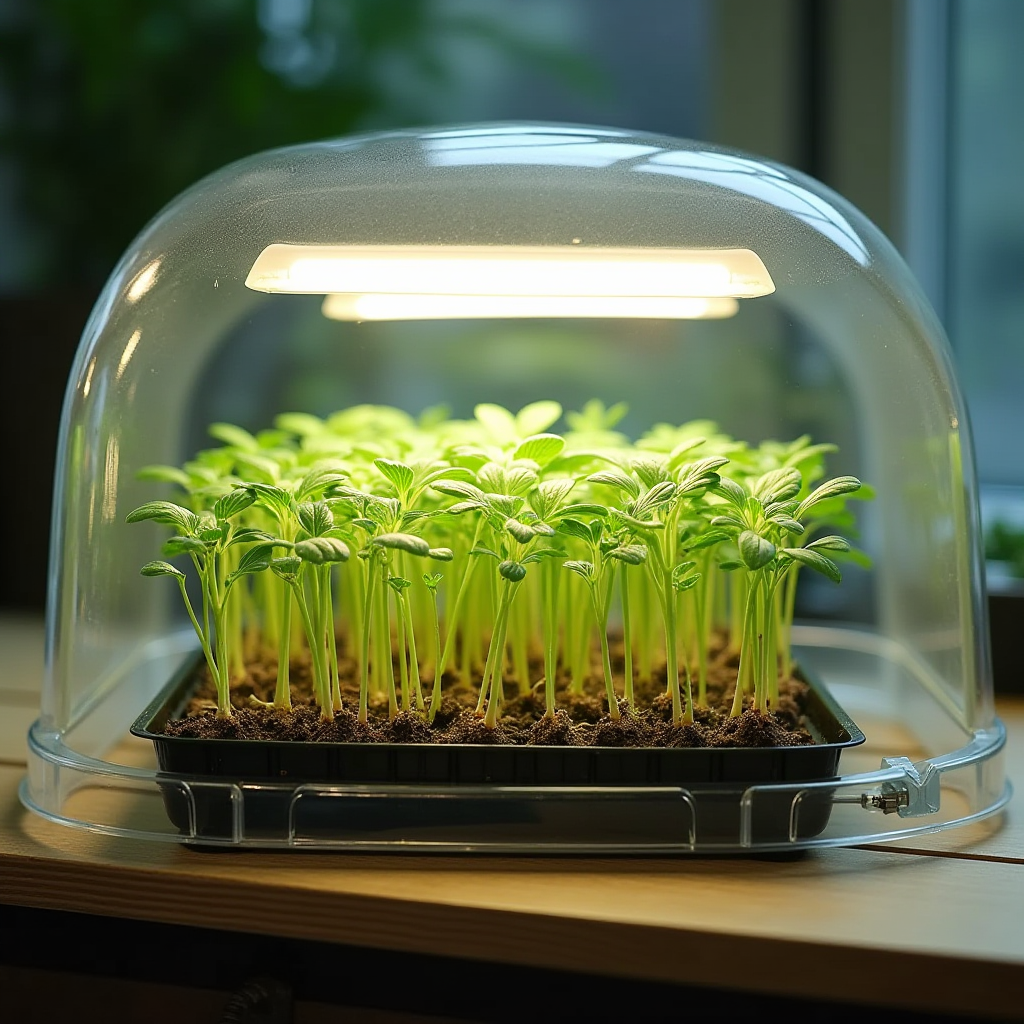
1. Choose the right dome shape: rounded, tall, and clear
If you want uniform hydroponic seedlings without changing your nutrients, start by fixing the lid.
Best propagation dome shape for hydroponics:
- Rounded or arched roof: Go for a lid that has a curved top, not a flat panel. The arch encourages condensate to slide to the edges rather than collecting in the middle. This mirrors why curved terraria show more consistent humidity and fewer stagnant layers, as shown in this terrarium shape comparison.
- Soft corners or beveled edges: Avoid sharp, 90‑degree internal corners. Rounded corners reduce dead air pockets. If you are stuck with boxy lids, you can improve airflow with fan placement or vent tweaks, but starting with better geometry is easier.
- Tall domes for hydroponic seedlings: Tall domes (around 15 to 20 cm / 6 to 8 inches) keep leaves and cotyledons away from the plastic. That reduces mechanical damage and mold risk as seedlings stretch. Tall domes are especially helpful for vigorous basil, lettuce, and brassicas you plan to move into DWC or NFT channels.
- Clear, non‑tinted plastic: For propagation under LEDs, avoid smoky or heavily tinted lids. You want maximum PAR transmission and predictable PPFD from your lighting plan.
Practical check: Flip the dome over and mist the inside. Watch where the water flows. If it naturally tracks to the outer rim instead of forming pools in the center, you are in the right geometry range.
2. Build vents that actually move air
Next, match your dome shape with vents that allow you to control humidity and fresh air.
Humidity dome vent design to prevent damping‑off:
- Perimeter venting: Instead of one vent dead in the center, aim for vents closer to the edges on at least two opposite sides. That encourages airflow across the tray, not just up and out.
- Multiple small vents over one large vent: Several smaller vents or slots give you finer control. You can open 25 to 50 percent of total vent area as seedlings emerge, instead of going straight from fully closed to fully open.
- Two‑stage opening plan: For most leafy hydro crops, keep vents mostly closed until cotyledons are up and most cells have popped. After 4 to 5 days, crack vents to 25 percent open. After 5 to 7 days, move to 50 to 75 percent open, matching what commercial guides suggest for humidity domes in hydroponics and microgreens, such as the advice from Hydrobuilder and Naturalyield.
- Dedicated “purge” vents: If you can modify lids, drill two 6 to 8 mm holes near opposite corners and cover with sliding plastic tape or simple shutters. Open these briefly once or twice a day in very humid rooms to dump saturated air fast.
- Match vents with room airflow: Point vents toward a gentle moving airstream in your nursery racks, not directly into a fan jet. You want a slow, consistent exchange, not a gale that dries out edge plugs.
3. Integrate a drip‑ridge or retro‑fit one
To stop condensation from raining on seedlings, you need a way to redirect water.
Seedling condensation management with a drip‑ridge:
- Built‑in drip‑ridge: Some high‑end domes have molded ribs or ridges that guide water outward. If you are buying new, this feature belongs high on your list.
- DIY drip‑ridge retrofit: If you are stuck with smooth lids, roughen a circular band or ring near the outer third of the dome interior using fine sandpaper. Light micro‑texture can make water “pin” there and run sideways before falling. Test this on one lid first.
- Outer gutter effect: Ensure the dome lip overhangs the tray slightly so runoff ends up outside plug cells, not onto the media surface.
- Operational habit: Any time you see large droplets forming directly above dense seedlings, vent or briefly lift the dome and let those droplets go before resealing. Several dome guides recommend venting or removing covers when heavy condensation appears, such as this step‑by‑step humidity dome article.
4. Set LED height and spacing for PPFD uniformity
Your dome shape can be perfect, but if the lighting is uneven, your tray will still be uneven.
LED spacing for seedling trays and PPFD uniformity:
- Target PPFD: For most leafy hydroponic seedlings (lettuce, basil, greens) aim for roughly 150 to 250 µmol/m²/s at the seedling canopy, measured at the dome roof and then adjusted for plastic loss (often about 5 to 10 percent).
- LED height above domes: For typical bar or panel LEDs, start with 20 to 30 cm (8 to 12 inches) between LED and dome roof. This reduces hotspots and keeps plastic from warping. Vendors selling humidity domes for grow lights also recommend spacing LEDs off the plastic to avoid heat issues, as noted by Bootstrap Farmer.
- Footprint rule: You want your LED fixture’s effective footprint to extend at least 5 to 10 cm (2 to 4 inches) beyond the tray edges. If the light footprint is the same size or smaller than your tray, corners will always lag.
- Bar lights vs panels: For multi‑tray shelves, two or more narrow bars spaced slightly wider than the tray can provide more uniform PPFD than a single panel directly in the middle.
- Check with a PAR meter or app: Measure PPFD at a 3×3 grid over the tray (four corners, four mid‑edges, and center). Try to keep variation within ±15 percent. If corners show less than 70 percent of the center PPFD, raise the light or widen spacing.
In hydroponic nurseries, this is often the cheapest performance upgrade: you do not buy new lights, you just raise, widen, or add a second bar and instantly tighten edge‑to‑center growth.
5. Match humidity strategy to hydro method
The best propagation dome shape for hydroponics still has to match the way your seedlings drink.
- Kratky plugs and jars: In passive setups, roots dive through net pots into static solution. Early on, seedlings depend more on humidity and foliar water. A slightly higher RH (75 to 90 percent) under the dome is acceptable in days 0 to 5. After that, start venting down to 65 to 75 percent as roots reach the solution.
- DWC and recirculating tray systems: Because substrates are often wetter and root zones more oxygenated, you can usually vent a bit earlier without stress. Watch for condensation on stems and surface saturation. If your plugs are glossy‑wet, you can open vents more aggressively.
- NFT seedlings: If you are transplanting to thin‑film channels, you want compact seedlings with strong stems, not stretched ones. That means moving from high humidity under domes to slightly drier, higher‑airflow environments sooner. Dome design and venting schedule are key here.
What To Watch Long‑Term: Benchmarks, Tuning, And Scaling
1. Visual benchmarks for a healthy dome microclimate
You do not need lab equipment to see if your dome geometry and venting are on point. Watch for:
- Condensation pattern: Light fog on the walls, fine beads on the roof, and minimal large droplets hanging directly over seedlings.
- Growth uniformity: Less than one leaf stage difference between center and corners by day 10 for leafy greens.
- Stem condition: No constricted, water‑soaked, or brown “necking” at the media line. That is classic damping‑off and a direct sign your surface stays too wet.
2. Quantitative targets for scaling
As you move from a few trays to a nursery rack or room, start tracking numbers.
- Humidity under domes: 75 to 90 percent RH for germination, then gradually down to 60 to 75 percent as vents open and seedlings harden off. Use a small digital hygrometer probe inside one representative dome to confirm.
- Temperature inside domes: Try to keep internal temperature no more than 2 to 3 °C above room temperature. If the center of the dome is significantly warmer than the corners, adjust LED height or add gentle rack airflow.
- PPFD variance: For commercial uniformity, aim for ±10 to 15 percent PPFD variation across the tray at seedling height.
3. System design for mini greenhouse airflow
If your propagation domes live inside a tent or mini greenhouse, treat that whole volume as one system.
- Top‑to‑bottom circulation: Use a small oscillating fan or inline fan so that warm air does not pool at the top of the enclosure. Better vertical mixing means domes on upper and lower shelves behave similarly.
- Cross‑flow: Arrange shelves so that dome vents face into gentle airflow paths. Cross‑ventilation inside the mini greenhouse supports the dome vent strategy you designed.
- Staggered LED layouts: In multilevel racks, make sure lights are centered over trays on each level. Avoid “stacked shadowing” where a top fixture shades a lower dome edge.
4. Feedback loop: use your trays as sensors
Once you have rounded domes, proper vent design, a drip‑ridge, and tuned LEDs, treat each tray like a sensor array.
- Mark trays in a grid and note which positions consistently have slower or weaker seedlings.
- Adjust vent opening, tray position, or LED height for those zones and track the next batch.
- If the same corner in your rack always underperforms, check airflow and light there first, not nutrients.
Over a few cycles, you can dial in a nursery where every seedling looks like it came out of a plug machine, ready to drop into Kratky jars, DWC buckets, NFT channels, or your main recirculating system.

As an Amazon Associate, I earn from qualifying purchases.