Feeding Mealworms to Tilapia in Aquaponics: Safe Rates, Water Quality, and Plant Nutrition (2026 Guide)
1. The Scenario: Cheaper Feed, Cloudier Water
“Tilapia love mealworms, and they’re free if I grow them. So why did my water go cloudy, TAN creep up, and lettuce slow down just two weeks after I switched?”
This is exactly what happens when you drop insect protein into an aquaponics system without treating it like a system-wide change. Tilapia will smash mealworms. The problem is what happens after the swallowing: more fats, different solids, chitin in the waste stream, and a slightly shifted nutrient profile making its way to your DWC rafts or Kratky buckets.
In this guide we’ll walk through a practical, field-tested way to integrate mealworms into existing tilapia aquaponics systems without crashing water quality or sacrificing plant yields. You’ll get concrete starting rates (10–25% of the diet), biomass-based feed maths, pre-treatment and hygiene, filtration and mineralization tactics, and plant-side tuning so your EC, Ca:K:Mg and yields stay on track while your feed bill drops.
Evidence from aquaculture research and recent insect-feed trials shows tilapia readily accept mealworm larvae and can perform well on diets where insect meal replaces a portion of fishmeal or soy, provided amino acids and minerals are balanced. This overview notes tilapia’s strong acceptance of mealworms as both live and processed feed. Our job here is to translate that into a stable, recirculating aquaponics context.

2. The Breakdown: What Mealworms Change Inside Your System
2.1 Can tilapia eat mealworms in aquaponics?
Yes. Tilapia are omnivores and will readily eat live, dried, or pelleted mealworms (Tenebrio molitor). Trials in tilapia aquaculture show mealworm meal can partially replace traditional protein sources without harming growth when diets are properly formulated. This article summarizes several of those studies and confirms tilapia’s strong acceptance of mealworm-based feeds.
For a home-scale aquaponics system, think of mealworms as:
- High-protein (often 45–60% crude protein in defatted meals).
- High-energy due to lipids (fats), which boost caloric density.
- Chitin-bearing, which slightly alters feces texture and mineralization dynamics.
None of this is a deal-breaker. But it does change how much TAN (total ammonia nitrogen), fine solids, and organic load you push into your biofilter and DWC/Kratky units per gram of feed.
2.2 How much mealworm can tilapia handle? (Diet inclusion)
In controlled studies, tilapia have handled fairly high inclusion rates of insect meals when formulated correctly. For practical, non-lab backyard aquaponics, you want to stay conservative and work up:
- Starter range: 10–20% of the diet (by dry weight) as mealworms.
- Experienced range: up to 30–40% of the diet, once you have months of stable readings and growth.
That percentage is of total daily feed, not of crude protein. The rest should be a balanced tilapia pellet that covers amino acids (especially methionine) and minerals.
2.3 Biomass-based daily feeding with mealworms
Always size the total feed to fish biomass first, then allocate a slice of that feed to mealworms.
For tilapia at 26–30 °C in a well-aerated RAS or aquaponic setup:
- Fingerlings (20–80 g): 3–4% of body weight per day.
- Grow-out (80–400 g): 2–3% of body weight per day.
- Market size (>400 g): 1–2% of body weight per day.
Example workflow:
- Estimate total biomass: say you have 40 kg of grow-out tilapia.
- Pick a feed rate: 2.5% BW/day → 40,000 g × 0.025 = 1,000 g total feed/day.
- Pick a conservative mealworm share: 20% of total feed.
- Mealworms: 200 g/day (dry-weight equivalent).
- Standard pellets: 800 g/day.
- Split feed into 2–4 portions to minimize waste and oxygen dips.
If you are feeding live mealworms, remember they are 55–70% moisture. Adjust by weighing a sample, drying it (low oven / food dehydrator) and measuring weight loss once to get your moisture factor.
2.4 Pre-treatment, hygiene, and disease risk
Mealworms can vector pathogens if raised on dirty substrates. Basic precautions:
- Use clean feedstock: grain, bran, clean veg trim; no animal manure or rotting scraps.
- Freeze before feeding: 24–48 hours at −18 °C will humanely kill larvae and help reduce parasite/pathogen risk.
- Optional blanching: dunk frozen larvae in near-boiling water for 30–60 seconds, then drain. This firms them up and further reduces microbial load.
- Feed what’s eaten in 5–10 minutes: remove uneaten clumps with a net; don’t let fat-rich leftovers decay in the tank.

3. The Action Plan: Integrating Mealworms Without Crashing Water Quality
3.1 Understand what mealworms do to TAN, nitrite, and DO
Any protein you feed eventually becomes ammonia (TAN) via fish metabolism and bacterial breakdown of solids. Mealworms are not magic; they follow the same rule. However:
- Higher fat means more organic carbon entering the system, which boosts heterotrophic bacterial activity. That increases oxygen demand and can thicken biofilms.
- Chitin and denser solids can mineralize more slowly, increasing the solids load and the risk of anoxic pockets if you don’t pull them out or mineralize them properly.
Your biofilter cares about total protein grams per day, not whether that protein came from soy, fishmeal, or insects. So when you add mealworms, do not raise total feed rate just because fish are excited. Keep total grams of feed stable while you swap part of it to mealworms and watch TAN and NO₂⁻.
3.2 Safe starting changes to the diet
For an already stable aquaponics system:
- Week 1–2: Replace 10% of existing dry feed with mealworms (by dry weight). Keep total grams of feed/day the same.
- Week 3–4: If TAN and NO₂⁻ stay near zero, DO is stable, and water clarity is acceptable, move to 20% replacement.
- Beyond Week 4: Consider 25–30% only after several weeks of clean data.
Do not jump from 0% to 40% insect inclusion overnight. The fish may tolerate it; your biofilter and DWC channels may not.
3.3 Daily and weekly monitoring checklist
Once you introduce mealworms, tighten your monitoring for at least the first 4–6 weeks:
- Daily (or every feeding)
- Observe fish: appetite, gasping, flashing, hanging near inlets.
- Check for uneaten mealworm clumps and remove them.
- Quick visual on tank and sump clarity; look for oily films or scum around inlets.
- 3–4x per week
- TAN (NH₃/NH₄⁺) with a liquid test kit.
- Nitrite (NO₂⁻).
- Nitrate (NO₃⁻).
- pH.
- DO if you have a meter (worth it for medium-to-large systems).
- Weekly
- Clean mechanical filters and check for sludge build-up.
- Inspect DWC channels or sump bottoms for settled gunk.
Target readings in a cycled, insect-feed-aware system:
- TAN: 0–0.25 mg/L (preferably undetectable).
- NO₂⁻: 0–0.25 mg/L (preferably undetectable).
- NO₃⁻: typically 20–150 mg/L, depending on plant load and water change regime.
- pH: 6.6–7.2 for tilapia plus leafy greens.
- DO: >5 mg/L in fish tanks and >4 mg/L in DWC channels.
If TAN or NO₂⁻ briefly blip up after a diet change but fall back within 24 hours, you’re likely within biofilter capacity. Sustained elevation means either feed is too high or solids management is lagging.
3.4 Mechanical separation: keep insect solids out of your plant roots
Fine, fatty particles from insect-rich diets can stay in suspension longer and coat surfaces more aggressively than standard pellet feces. Before that water reaches your media beds or DWC rafts:
- Install or tune a radial flow settler (RFS) or swirl filter directly after the fish tank outlet.
- Target a hydraulic retention time of 3–10 minutes in the RFS for good settling.
- Bleed solids daily from the bottom valve. Insect-rich sludge can go sour quicker.
- Add an inline screen or drum filter if you are feeding heavily (>500 g/day) to catch fines.
For DWC systems, consider a small polishing stage (filter sock, brush filter, or static media filter) between the clarifier and the raft beds. This keeps insect-feces films off roots and raft undersides.
3.5 Biofilter sizing and oxygen with insect diets
Biofilter capacity is tied to feed input. Many aquaponic designers use rough rules like:
- 20–60 g feed/day per 100 L of well-aerated media bed, or
- Manufacturer-rated grams of feed/day per liter of moving-bed media.
When you introduce mealworms:
- Assume no “discount” on required biofilter size just because of insects.
- If you are feeding near the limit already, treat insect inclusion as a signal to add 25–50% safety margin in biofilter media or reduce total feed.
- Boost air delivery to both biofilter and fish tank. Consider an extra airstone in your moving bed or trickle filter.
Warning signs your biofilter is under strain:
- TAN >0.5 mg/L or NO₂⁻ >0.5 mg/L for more than 48 hours.
- DO sag at night or just before lights-on in indoor systems.
- Biofilter smells “swampy” rather than earthy.
If you see these, cut feed by 25–50%, flush solids more aggressively, and plan to add biofilter volume.
3.6 Mineralization of insect-rich solids
Many macro- and micronutrients end up locked in the solid fraction. Insect-based solids may carry significant phosphorus and trace minerals, so it’s worth running a simple mineralization tank rather than throwing everything away.
Basic mineralization loop:
- Pull sludge from the clarifier / RFS daily into a separate tank (e.g. 60–200 L barrel).
- Add vigorous aeration and periodic mixing (manual stir or airlift) to keep solids in suspension.
- Maintain pH around 6.5–7.5.
- Let it run for 3–7 days, then stop mixing and let it settle for a few hours.
- Decant the clearer, nutrient-rich water off the top back into the plant loop, not directly into the fish tank.
- Remove residual sludge as needed (weekly or biweekly) and compost or further process it.
Because insect solids can have more fat, make sure the mineralization tank has strong aeration to avoid greasy surface films and anaerobic zones.

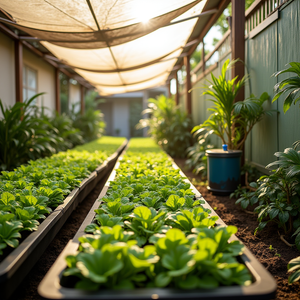
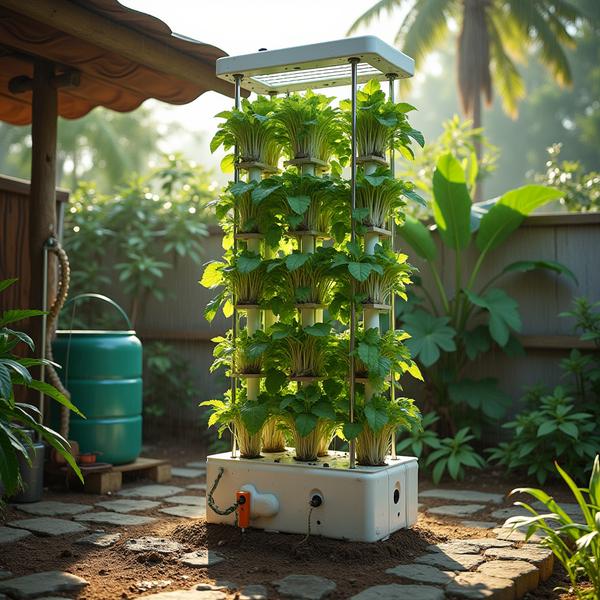
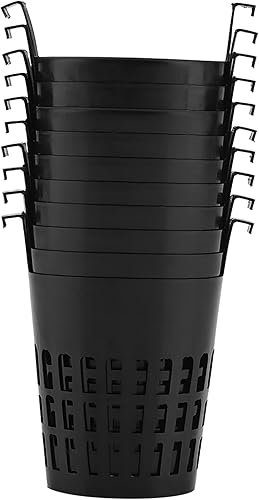
3.7 Integrating with DWC and Kratky plant systems
Most aquaponics growers are running either:
- DWC rafts fed directly from the recirculating loop, or
- Kratky-style static reservoirs that are occasionally topped up with fish water.
Mealworms do not change the core hydraulics, but they can change how fast you dirty the plant side.
- DWC:
- Keep roots white and free of slime by making sure fines are removed upstream.
- Add an air stone to long channels, especially with heavier insect feeding, to prevent low-DO zones under roots.
- Vacuum or siphon channel bottoms every few weeks to remove settled insect feces.
- Kratky (using aquaponic water):
- Fill Kratky totes or jars with pre-filtered water from the plant loop, not straight from the fish tank.
- Let solids settle overnight in a separate container if water seems cloudy, then pour off the clearer top fraction for Kratky use.
- Monitor EC and pH in static reservoirs; they will drift as plants draw nutrients.
3.8 Plant nutrition: when insect feed shifts the chemistry
Compared with a purely plant-based feed, some insect-enriched diets may deliver slightly different ratios of phosphorus and trace elements downstream, but you should expect the same general aquaponic pattern:
- Nitrate: usually abundant if you are feeding enough for healthy fish growth.
- Potassium: often marginal for fruiting crops.
- Calcium and magnesium: frequently under-supplied relative to hydroponic “ideal” levels.
- Iron and micronutrients: commonly limiting for greens at pH >6.8.
The insect component may boost phosphorus and some micro elements, but it rarely fixes Ca/K/Mg imbalances on its own. You still need to tune the plant side like a low-EC hydroponic system.
3.9 Tuning Ca:K:Mg and EC so greens keep moving
Think in terms of three dials: pH buffer choices, supplements, and target EC.
- pH and Ca/K:
- Use calcium hydroxide (hydrated lime) and potassium hydroxide or potassium bicarbonate to raise pH and supply Ca and K simultaneously.
- Alternate Ca and K additions so you do not starve plants of either.
- Keep pH in the 6.6–7.2 window for good nutrient availability and biofilter performance.
- Magnesium:
- Add magnesium sulfate (Epsom salt) in small, repeated doses if you see interveinal chlorosis on older leaves and low EC.
- Iron:
- Dose chelated iron (Fe-EDDHA or Fe-DTPA) into the plant loop every 2–4 weeks if new growth pales or veins yellow while older leaves stay green.
- EC targets:
- Leafy greens in aquaponics often run happily at 0.8–1.5 mS/cm.
- Fruiting crops (tomato, pepper, cucumber) generally prefer 1.5–2.5 mS/cm in classic hydroponics, but many aquaponic systems operate them around 1.2–2.0 mS/cm with good results.
If you increase the mealworm fraction but hold total feed stable, EC may not move dramatically. If you use insect feed as an excuse to push feed harder, EC and nitrate will climb. Let your plants be the judge: if greens are dark and lush but stretching slowly, EC is likely fine; if growth is weak and pale at low EC, you may need more Ca/K/Mg and iron, not just more feed.
4. Benchmarks & Metrics: When You’ve Dialed It In
4.1 Fish-side benchmarks
You can consider your mealworm integration “stable” when:
- Tilapia eat the insect/pellet mix aggressively with no long-term FCR penalty (roughly 1.2–1.8:1 for warm, well-managed systems).
- TAN and NO₂⁻ remain close to zero even at your target feed rate.
- DO stays above 5 mg/L in tanks and there is no chronic surface foaming or oil slick.
- There is no off-odor from the biofilter or clarifier.
At this point you can consider nudging mealworm inclusion towards the 25–30% mark if you want to cut purchased feed costs further.
4.2 Water-quality benchmarks
For a tilapia–greens/fruit aquaponic system running insect-inclusive feed:
- TAN: <0.25 mg/L, ideally undetectable.
- NO₂⁻: <0.25 mg/L, ideally undetectable.
- NO₃⁻: 20–150 mg/L depending on crop and water-change strategy.
- pH: 6.6–7.2, with slow drift over days, not wild swings during the day.
- EC (plant loop): 0.8–2.0 mS/cm, tuned to crop type.
- Visual: slight tea tint is fine; persistent cloudiness or scum is not.
4.3 Plant-side benchmarks (DWC and Kratky)
On the plant side, you know your insect-feeding program is not hurting yields when:
- DWC lettuce or basil roots are white/cream with minimal brown slime.
- Greens have consistent new growth with only minor, manageable tip burn under strong light.
- Fruiting crops set and size fruit reliably once EC and K/Ca/Mg are topped up.
- You are not fighting chronic deficiencies (e.g. interveinal chlorosis, blossom end rot) once pH and supplements are dialed in.
4.4 A simple upgrade path for most growers
If you are running a typical 500–2,000 L tilapia aquaponics system with DWC or mixed beds and you want to integrate mealworms, a clean, practical path looks like this:
- Baseline: Record TAN, NO₂⁻, NO₃⁻, pH, and EC for 1–2 weeks on your current pellet-only diet.
- Week 1–2: Swap 10% of dry feed for frozen mealworms. Keep total grams/day and feed schedule unchanged. Monitor closely.
- Week 3–4: If readings are steady, move to 20% inclusion. Clean filters and DWC channels more aggressively.
- Add a mineralization barrel for clarifier sludge once you see consistent solids accumulation.
- Start measuring EC in the plant loop and adjust Ca/K/Mg and iron based on both EC and leaf symptoms.
- Stabilize for at least a month before considering 25–30% inclusion or higher total feed.
Handled this way, mealworms stop being a “cool experiment” and become a reliable part of your feed program that supports both fish growth and plant yields.
As insect-based aquafeeds continue to move from research into practice, more detailed nutrient data on mealworm-based aquaponics will emerge. For now, the combination of conservative inclusion rates, strong mechanical separation, aerobic mineralization, and hydroponic-style nutrient tuning gives home growers a robust, repeatable way to cut feed costs without sacrificing system stability.
As an Amazon Associate, I earn from qualifying purchases.