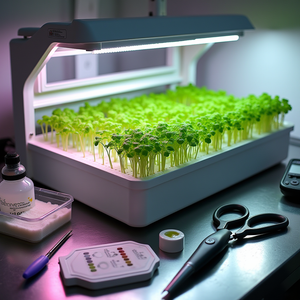
Safe CO2 Enrichment for Sealed Vertical Hydroponic Farms: PPM Targets, Injection Sizing, and Sensor Interlocks
Common Mistakes
“CO2 is plant food – more is better.” That belief is how a lot of vertical farms end up with flat yields, wasted gas, or unsafe rooms.
In tightly sealed, positive-pressure hydroponic rooms – like the smart vertical plant factories highlighted in this overview from China’s vertical farming rollout – CO2 is a major performance lever. But in real farms, I see the same patterns over and over:
- Running “some enrichment” (600–700 ppm) with high-intensity lighting and expecting big gains.
- Overshooting to 1,500+ ppm without mixing, so the bottom tier is overloaded while the top tier runs near ambient.
- Sizing CO2 injection by guesswork instead of calculating how many grams are actually needed for the room volume.
- Placing a single sensor near the ceiling, then being surprised when people feel drowsy at floor level.
- Ignoring safety interlocks and purge logic, even though rooms are sealed and air changes per hour (ACH) are low.
You can run a sealed, low-ACH, smoke-resilient vertical farm safely and efficiently. You just need three things dialed in:
- Clear CO2 ppm targets by crop and stage.
- Simple, repeatable injection math for your room volume.
- Solid sensor placement, mixing, and interlocks that treat CO2 like the asphyxiant it is.

Why They Happen
1. No clear ppm targets by crop and light level
Most sealed farms copy greenhouse CO2 numbers or run whatever their controller vendor suggested. But lettuce and leafy greens hit a plateau in photosynthetic response well below the levels that fruiting crops like tomato can use. Plant physiology research on C3 crops shows that once light is limiting or Rubisco sites are saturated, extra CO2 gives diminishing returns and may just sit in the air as waste.
For vertical-farm lettuce under modern LED lighting, realistic enrichment bands look like this, assuming decent PPFD and stable nutrients:
- Ambient baseline: ~400–450 ppm.
- Propagation (seedlings, low light 100–200 µmol·m⁻²·s⁻¹): 600–800 ppm.
- Vegetative (main bulk, 250–350+ µmol·m⁻²·s⁻¹): 800–1,000 ppm.
- Pre-harvest / conditioning zone: 600–800 ppm or ambient if you’re blending more fresh air for quality.
This matches published photosynthesis response curves for leafy greens under controlled environment conditions summarized in plant physiology literature: extra CO2 helps most when light, nutrients, and temperature are not the bottleneck.
2. No mass balance – just “turn the bottle up”
If you don’t convert ppm to grams in your actual room volume, you can’t size injectors, cylinders, or alarms properly. The math feels intimidating, so people skip it.
At standard indoor conditions (about 25 °C and 1 atm), the conversion is simple:
- 1 ppm CO2 ≈ 1.8 mg/m³
- 1,000 ppm CO2 ≈ 1.8 g/m³
So every time you change CO2 by 100 ppm in 1,000 m³ of air, you’re moving about 180 g of gas. In a compact vertical room, that mass adds up fast if you overshoot setpoints or enrich during exhaust cycles.
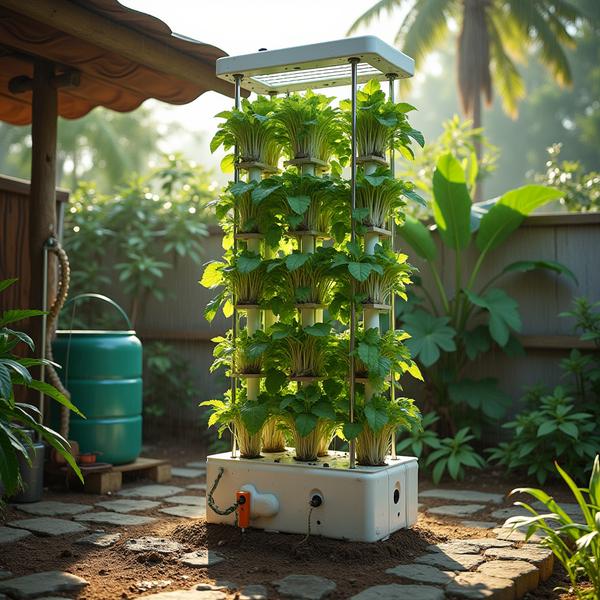
3. Ignoring vertical stratification in multi-tier racks
CO2 is heavier than air. In a tightly sealed plant factory with tall racks, it tends to accumulate low unless you mix aggressively. If you only measure at the control panel or near the ceiling, you may be running 1,400 ppm on the bottom tier and 500 ppm on the top.
This is exactly the kind of uneven climate that advanced Chinese vertical farms are solving with rack-integrated airflow and sensor networks, as discussed in field reports from recent deployments. The same logic applies in any sealed room.
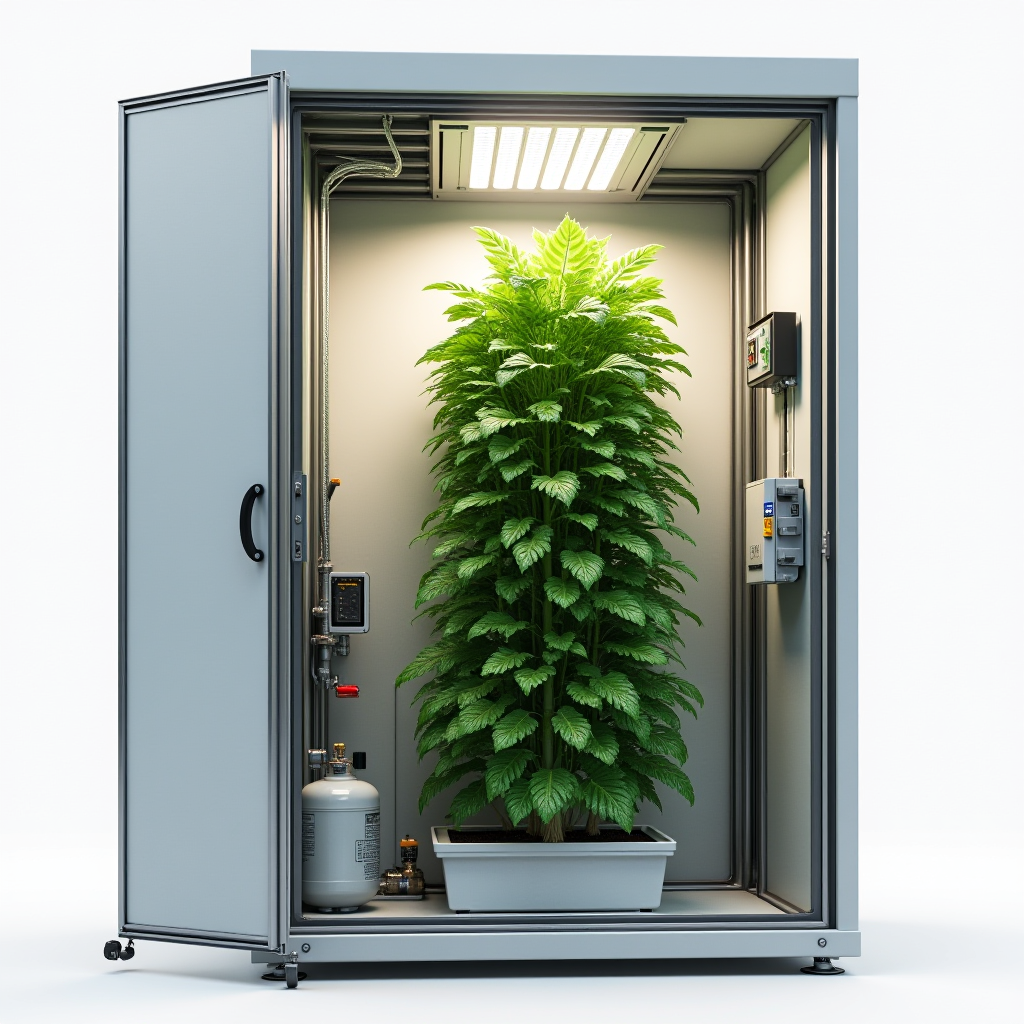
4. Weak or missing safety interlocks
Low-ACH sealed rooms are great for energy efficiency and for keeping outdoor smoke and pollution out. They are also excellent at trapping any gas you put in. Without hard cutoffs and purge logic, it only takes one failed solenoid or one misconfigured setpoint to send CO2 to dangerous levels for staff.
That’s a process-safety problem, not just an agronomy problem.

How to Fix Them
1. Lock in realistic CO2 ppm targets by crop and zone
For sealed vertical lettuce and leafy greens, use these as working starting points:
- Seedling / propagation (low light, high density trays):
- CO2: 600–800 ppm
- Goal: strong roots and uniform starts, not maximum biomass.
- Vegetative bulk zone (main racks):
- CO2: 800–1,000 ppm
- Only push toward 1,000 ppm if PPFD and nutrients are strong and evenly distributed.
- Pre-harvest / QA zone:
- CO2: 600–800 ppm or ambient.
- Often run with more fresh air to condition product and stretch shelf life.
For higher-demand crops in the same facility (basil, high-light herbs, some fruiting crops in DWC), you can explore 1,000–1,200 ppm in dedicated rooms with tighter safety controls, but you should validate with yield and quality data rather than assuming “more is better.”
2. Use simple CO2 injection math for any room volume
The key is to translate your ppm change into grams per hour. At around 25 °C:
- 1 ppm CO2 ≈ 1.8 mg/m³
- Δppm × 1.8 mg/m³ × room volume (m³) = grams needed
Example: step from 450 ppm to 900 ppm in a 300 m³ room
- ΔCO2 = 900 − 450 = 450 ppm.
- Convert to mg/m³: 450 ppm × 1.8 ≈ 810 mg/m³.
- Total mass: 810 mg/m³ × 300 m³ = 243,000 mg ≈ 243 g CO2.
That 243 g is just to make the initial jump. To stay at setpoint, you need to cover plant uptake plus any leakage. For lettuce under good light in a tight room, a rough rule of thumb is replacing 20–40 % of the room’s CO2 mass per hour during lights-on.
Example: hourly maintenance rate
- At 900 ppm, concentration ≈ 1.8 g/m³ × 0.9 = 1.62 g/m³.
- Room load: 1.62 g/m³ × 300 m³ ≈ 486 g CO2 in the air.
- 30 % per hour: 0.3 × 486 ≈ 146 g/h.
To convert that to gas flow at near-atmospheric pressure, use roughly 1 g CO2 ≈ 0.5 L of gas:
- 146 g/h ≈ 73 L/h ≈ 1.2–1.3 L/min of pure CO2.
This is the kind of number you want to see printed in your design notes and controller setup, not “open valve to 20 %.”
3. Integrate CO2 with dehumidification and ventilation
In sealed hydroponic rooms, most “ventilation” happens via dehumidification and occasional purge cycles. If you run CO2 at full blast while your HVAC dumps moist air outside, you literally exhaust money.
Smart integration looks like this:
- When dehumidification uses DX or chilled coils with condensate only: You can often keep CO2 enrichment active, as you’re not exhausting air, just condensing water and recirculating.
- When humidity control relies on active exhaust and makeup air: Program the CO2 controller to reduce or pause enrichment whenever exhaust fans or purge dampers are open above a set threshold.
- For purge events (heat or safety): Force CO2 setpoint to ambient, close valves, and log the event so you can sanity-check gas usage vs. plant uptake.
This kind of coupling is already standard in advanced controlled-environment systems discussed in sustainability and resource-efficiency coverage on ScienceDaily’s sustainability reports. It belongs in your vertical farm too.
4. Design for even CO2 distribution: manifolds and mixing fans
Good CO2 numbers on the controller are meaningless if the canopy never sees them. Distribution and mixing are non-negotiable in rack farms.
Practical patterns that work:
- Perforated manifold at canopy height: Poly tube or CO2 “sock” with small holes, run along racks or aisles just above the crop.
- Rack-level drops: Small outlets on each tier, pointing across the canopy instead of straight down.
- Horizontal airflow (HAF) fans: Small fans arranged to create gentle circular airflow through each aisle.
- Vertical mixing fans: Low-watt units that move air between lower and upper tiers to break up stratification.
At the canopy, aim for airspeeds in the 0.1–0.3 m/s range. That is enough to mix CO2 and moisture without wind-burning lettuce.

5. Place sensors where the plants (and people) actually are
Your CO2 control depends on what the sensors see. Get that wrong, and the whole system drifts.
Guidelines for sealed hydroponic rooms with vertical racks:
- Measure at canopy height. On multi-tier racks, mount sensors near representative tiers: one low, one mid, one high.
- Keep them out of direct CO2 streams. If a sensor sits right in front of a manifold hole, it will see false spikes and cycle the system.
- Use at least 1–2 sensors per 50–100 m² of grow area. More if your layout is complex.
- Protect from splash and mist. Use vented housings or splash guards to avoid damage from NFT spray, DWC splashes, or foliar work.
Control logic can be simple but deliberate:
- Setpoint example: 900 ppm.
- Deadband: inject below 850 ppm, shut off above 950 ppm.
- Use a 30–120 second moving average of all active sensors.
- Optionally control off the lowest sensor to make sure no zone falls under target.
6. Implement real safety interlocks and alarms
For low-ACH vertical rooms, build safety like you would for a gas-fired boiler, not a hobby tent.
- Hard high-CO2 cutoff:
- If any sensor reads above a defined safety threshold (often 1,500–2,000 ppm, depending on local regulations), force CO2 valves closed and trigger purge fans.
- Dedicated safety monitor:
- Separate from the control sensors, installed at breathing height (around 1.2–1.5 m), with audible/visual alarms and a relay to cut injection and start purge fans at a higher emergency threshold.
- Door and occupancy logic:
- Optionally reduce setpoints while staff are inside, or only allow enrichment when the room is in “unoccupied” mode.
- Ventilation interlock:
- If general exhaust is running beyond a small baseline, automatically scale back or suspend CO2 injection.
All of this rests on regular calibration. Follow manufacturer intervals, but in practice, checking CO2 sensors every 6–12 months and replacing old units keeps your readings honest.
7. Choose CO2 sources that match sealed vertical farm realities
You have two main options: cylinders (compressed or liquid) and on-site generators.
Cylinders or bulk liquid CO2
- Pros: Clean, dry gas; no extra heat or humidity; easy to meter with solenoids and flow meters.
- Cons: Ongoing gas cost and logistics; need ventilated storage with proper securing and leak checks.
For most sealed vertical farms, this is the safer, simpler choice.
CO2 generators
- Pros: Lower cost per kg in large operations; adds useful heat in cold climates.
- Cons: Adds heat and water vapor that your HVAC must remove; risks of CO and NOx if combustion is imperfect; generally overkill or problematic in compact sealed rooms.
Generators tend to make more sense in large, high-volume greenhouses rather than tight, multi-tier hydroponic rooms.
8. Sync root-zone management with higher CO2
CO2 enrichment only pays off if roots can keep up. In DWC, NFT, and modified Kratky systems, higher CO2 and light drive higher nutrient and water demand. That means tighter pH and EC management.
Typical targets for lettuce in Kratky and DWC:
- EC:
- 0.8–1.2 mS/cm for seedlings.
- 1.2–1.8 mS/cm for vegetative bulk (often 1.4–1.6 mS/cm for a good balance of growth and quality).
- pH:
- 5.5–6.0 as the main operating band; avoid drifting above 6.5.
In Kratky-style reservoirs, solution levels drop and EC can climb as plants drink. In DWC, a shared, aerated reservoir with dosing control can hold EC and pH steady even under aggressive CO2-driven growth.
What to Watch Long-Term
1. Yield, cycle time, and gas-use efficiency
Your goal is not just “higher ppm.” It is kilograms of marketable product per kWh and per kg of CO2 used.
Track the following over several crops:
- Average CO2 setpoint and actual room ppm.
- kg of CO2 delivered per day (from cylinder logs or flow meters).
- Harvest weight per square meter per cycle and days from transplant to harvest.
Then adjust CO2 setpoints up or down and see if yield, cycle time, or quality actually improve relative to gas cost. That is the same optimization mindset used in smart plant factories reported from China and other advanced CEA hubs.
2. CO2 uniformity across racks and tiers
At least once per quarter, map CO2 with a portable meter:
- Pick a stable time mid-photoperiod.
- Measure at multiple points: top, middle, and bottom tiers; front and back of aisles.
- Log values and look for more than ±100 ppm deviation from setpoint.
If you see big swings, revisit manifold holes, fan placement, and sensor positioning before you chase the issue with more gas.
3. Sensor drift and calibration discipline
Even high-quality non-dispersive infrared (NDIR) CO2 sensors drift over time. Set a recurring calendar task to:
- Check control sensors against a reference or calibration gas.
- Verify that safety monitors alarm and interlocks trigger at the expected ppm levels.
- Replace any sensors that show repeated drift or erratic behavior.
4. Root-zone response under enriched CO2
Higher atmospheric CO2 pushes plants to drive more carbon into biomass, but only if they can pull enough nutrients and water from solution. Watch for:
- Faster EC drop in DWC reservoirs during peak growth, signalling increased nutrient uptake.
- pH drift patterns that change as you raise CO2 and light; this can indicate shifts in nitrogen form uptake and root exudation.
- Any increase in tip burn, which may mean that Ca delivery (airflow, transpiration, or Ca supply) is becoming the new bottleneck.
Respond by tightening nutrient dosing, verifying DO levels in DWC, and tuning airspeed at the canopy. In Kratky and NFT systems, consider gentle recirculation or added aeration if roots look stressed under higher CO2-driven growth.
5. Safety drills and documentation
A sealed, CO2-enriched vertical farm is an industrial space, even if it fits inside a warehouse bay. Treat it like one:
- Document setpoints, alarm levels, and purge sequences.
- Train staff on what to do if alarms sound or if anyone feels lightheaded.
- Test emergency ventilation and interlocks on a fixed schedule.
That way, as you chase better yield and efficiency, you are not quietly building a safety liability.
Bottom line
Sealed vertical hydroponic farms can run higher yields, tighter climates, and better resilience to outdoor smoke and pollution. To get there safely, treat CO2 like any other engineered input:
- Set crop- and zone-specific ppm targets instead of guessing.
- Do the injection math in mg/m³ and grams per hour for your room volume.
- Design manifolds, mixing fans, and sensor layouts around your rack geometry.
- Hard-wire safety interlocks, alarms, and purge logic for people, not just plants.
- Match nutrient, pH, and EC control to the higher uptake you’re pushing with enriched CO2.
Do that, and your sealed, positive-pressure rooms stop being experimental boxes and start behaving like reliable, high-performance plant factories.
As an Amazon Associate, I earn from qualifying purchases.