Solar-powered hydroponics in the tropics: most people think “just add a panel to a pump and you’re done.” That shortcut is exactly how systems cook roots, stall NFT flow at noon, and die the first cloudy week.
Section 1: The 4 big solar-hydro mistakes growers keep repeating in the tropics
Mistake 1: Treating solar like grid power and running AC pumps through cheap inverters
In hot, high-sun regions, most small growers still copy greenhouse designs from cooler climates: AC submersible pump, plug-in timer, and a bargain inverter on a single panel. On paper it “works.” In the field it looks like this:
- Inverter trips or undervolts when clouds pass.
- Pump stalls just when channels are hottest.
- Every conversion step (DC to AC, then back to mechanical) wastes power you don’t have.
The result: NFT channels or DWC beds that were perfectly fine at 10 a.m. are bone-dry or deoxygenated by 14:00, exactly when tropical sun is brutal.
Mistake 2: Sizing the pump by “litres per hour” on the box, not by head and daily duty
Another classic: choosing a pump based only on the biggest flow number printed on the label. That rating is at zero head, in a lab, with cool water. In reality your NFT or DWC system has to lift water:
- From a buried or shaded reservoir up to channels 1–2 m higher.
- Through elbows, tees, and long runs of pipe.
At that higher head, many “1000 L/h” hobby pumps barely move 300–400 L/h, and solar voltage sag makes it worse. Nutrient film becomes a trickle, the far end of your channels dries out, and root tips burn.
Mistake 3: Ignoring nutrient temperature in 30–35 °C climates
Most hydroponic tutorials assume ambient air around 20–24 °C. In Nairobi, Mombasa, Accra, Manila, that is a fantasy. Midday ambient can sit at 30–35 °C in the shade, and shallow, sun-exposed nutrient can spike above that.
Once root-zone solution spends hours above ~28–30 °C, dissolved oxygen crashes and pathogens win. In DWC, you see brown slime and sagging leaves. In NFT, you see root burn and sudden wilt even when EC and pH are fine.
Mistake 4: Trusting unsafe, unreliable water treatment
Where water is scarce, you cannot afford to “flush and forget.” Growers often reuse canal, borehole, or rooftop harvest water with nothing but a cloth filter and hope. That invites:
- Biofilm-clogged emitters and NFT inlets.
- Salt creep in arid regions, quietly pushing EC higher every cycle.
- Pathogens that thrive in hot, nutrient-rich solution.
Meanwhile, the global commercial greenhouse sector is moving the other way: more controlled irrigation, more efficient energy use, and heavier reliance on protected production, with the market projected to reach about $62.5 billion and continue expanding through 2035, driven in part by energy-efficient tech and water-smart systems as highlighted in this market report.
Smallholders and balcony growers in the tropics need the same mindset, but with simpler hardware.

Section 2: Why these failures happen in tropical, off-grid NFT and DWC systems
Reason 1: The energy profile of the tropics is different
In many tropical belts you have excellent solar resource on paper, but in reality it is spiky: clear, intense mornings, convective clouds after midday, and sudden storms. Kenya is a good example. As highlighted in this recent report on solar irrigation in Kenya, solar pumping is already improving resilience and crop reliability for smallholders precisely because it replaces diesel and grid outages.
The same pattern hits hydroponics. If you design your pump and controller as if solar power is flat and predictable, you end up with either:
- Oversized AC gear that barely runs for part of the day, or
- Underpowered DC gear that collapses just when you need flow.
Reason 2: Head and plumbing losses are ignored
Most NFT and DWC diagrams show neat arrows and flat lines. Real systems snake around posts and over walkways. Every elbow, tee, and narrow hose adds friction, so the pump must act against higher head than the vertical lift alone. If you do not design from head and required flow at that head, a “1000 L/h” pump can behave like a weak fountain.
Reason 3: Heat load and dissolved oxygen are poorly understood
In warm climates, nutrient temperature is more critical than air temperature. Dissolved oxygen falls as water warms, and root metabolism and pathogen growth speed up. In an uninsulated black reservoir under full sun, nutrient solution can cross 32–34 °C by early afternoon. At that point, even a correctly mixed nutrient, perfect EC, and textbook pH cannot save your roots if oxygen is missing.
Commercial greenhouses are leaning heavily into energy- and climate-efficient designs, as highlighted at events like Gulfood 2026, where controlled environment agriculture and water-efficient systems shared the stage with food security tech. In the tropics, anyone building NFT or DWC has to think like a small-scale climate engineer, not just a hobby grower.
Reason 4: Water quality is variable and treatment isn’t planned into the system
Smallholders and balcony growers often use whatever water source is closest: roof runoff, shallow wells, community taps, or even canal water. Each behaves differently:
- Roof runoff can carry sediment, organics, and sometimes fecal pathogens.
- Borehole water in dry regions can be mineral-heavy, with high EC and hardness.
- Canal or pond water often carries algae, fine silt, and biofilms that thrive in warm nutrient.
Without simple pre-treatment and periodic disinfection, every warm day is pushing that biology towards pump clogs, blocked NFT inlets, and plant disease.
Section 3: How to fix it - a practical blueprint for solar NFT/DWC in the tropics
Step 1: Decide your method and risk tolerance
Start with the hydro method, then design the solar side around it.
- Kratky (no pump): Best for micro and balcony systems, fast greens, and ultra-low budgets. Your main job is shading, nutrient mixing, and EC management. Solar is optional, not required.
- DWC with DC air pump: Good compromise for smallholders. Large volume buffers heat and oxygen, and if the pump dies you still have Kratky-style deep water under the roots.
- NFT with DC water pump: Higher risk but offers excellent oxygenation and efficient water use. Needs smart solar sizing and good heat management.
If you are new to hydroponics, start with Kratky or DWC. Go to NFT once you are comfortable with EC, pH, and plant behavior in your climate.
Step 2: Batteryless vs LFP-battery designs
Batteryless (direct-coupled) and LFP-battery systems solve different problems.
- Batteryless DC (direct-coupled):
- Pump runs only when the sun is strong enough.
- No battery cost, no battery failures.
- Perfect for daytime-only NFT flow and daytime DWC aeration.
- LFP-battery buffered:
- Solar panel charges a LiFePO4 (LFP) battery.
- Pump draws from the battery, smoothing clouds and covering evening/night.
- Higher cost and more complexity, but more stable flow.
In hot climates, plants suffer more from heat and oxygen collapse at midday than from a few hours of reduced flow at night. That is why, for leafy greens and smallholder scales, I recommend:
- Batteryless DC for most NFT and DWC cases, with systems designed to survive pump-off periods.
- Small LFP buffer only if you are running sensitive crops, very long NFT runs, or selling commercially where risk tolerance is low.
Step 3: DC pump sizing from head and daily flow needs
This is where most systems are won or lost. Work backwards from plants to watts.
3.1 Define your system size
- Count channels or tank volume.
- Define crop type (leafy vs fruiting) and target planting density.
Example NFT system:
- 24 channels, each 6 m long, leafy greens.
- Target: about 1 L/min per channel for solid oxygenation.
Required flow ≈ 24 L/min = 1440 L/h.
3.2 Determine total dynamic head (TDH)
- Measure vertical lift: nutrient surface in the reservoir to the highest point in your feed manifold.
- Add 20–30% for friction losses in short hobby systems.
If your vertical lift is 1.2 m, design for ~1.5–1.8 m head.
3.3 Select a pump based on the curve, not the box headline
You want a 12 V or 24 V brushless DC pump that delivers your target flow at your design head.
From our example:
- Need ≈ 1440 L/h at 1.5 m.
- Choose a pump with a curve showing ~1500–1800 L/h at 1.5 m.
- Electrical draw will likely be in the 30–40 W range.
Add ~25% safety margin if budget allows. A pump running at 70–80% of its maximum is happier and more efficient than one at its limit.
3.4 Size the PV array for batteryless direct drive
For direct-coupled systems with a simple MPPT pump controller, the reliable rule is:
- Panel power (Wp) ≈ 2–3 × pump rated watts.
For a 30 W pump at 24 V:
- Panel: 80–100 Wp (for example, one 100 Wp module).
- Connect through a DC-DC/MPPT pump controller or a dedicated solar pump driver.
This oversizing ensures the pump starts early in the morning, runs near full power for the core of the day, and remains useful through partial cloud. In Kenya and similar latitudes, that often gives you 6–8 strong pumping hours even in a “mixed” day.
3.5 Air pump sizing for DWC
For DWC, your main load is the air pump. Size it by volume:
- Rule of thumb: ~0.5–1 L/min air per 10 L of nutrient, or at least 1–2 L/min per bed for small systems.
If you have 4 × 200 L DWC tanks (800 L total):
- Target air: 40–80 L/min.
- That usually means a 10–20 W DC air pump with multiple outlets and stones.
- Panel: 30–60 Wp, assuming the 2–3× rule.
Step 4: Midday irrigation and aeration scheduling without timers
In a batteryless DC system you often skip complex timers. The sun is your timer.
- Panels face equator (south in the northern hemisphere, north in the southern), tilted roughly to your latitude for a strong midday peak.
- The pump naturally reaches maximum output during the same hours your nutrient and roots are hottest.
- Clouds act as a “throttle.” Flow ramps down during storms and resumes after.
If you want to hard-limit pumping (for example, to avoid over-warming shallow NFT solution late in the day), you can still use simple mechanical or low-power digital timers on the DC side. In most tropical NFT and DWC designs, continuous circulation during sun is beneficial, provided you manage temperature correctly.
Step 5: Keeping nutrient temperatures in the safe zone
For most leafy greens and herbs, aim to keep nutrient solution in the 18–26 °C band where possible, and definitely below ~28 °C for long stretches.
5.1 Passive thermal controls
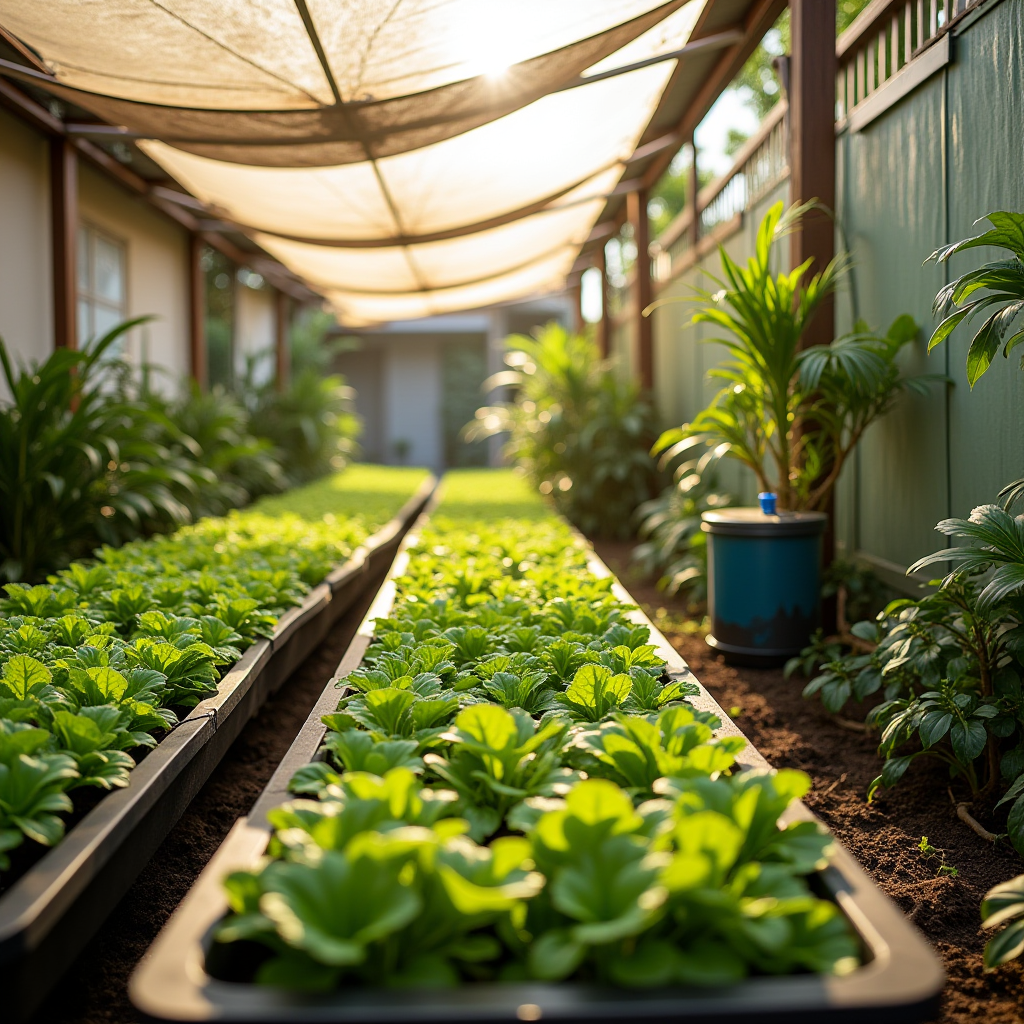
- Shade the reservoir: Use 50–80% shade cloth or a solid roof. Never use clear tanks. Either buy opaque containers or paint the outside white.
- Increase volume: A 200 L drum will heat more slowly than a 60 L tote. In DWC, deep beds act as a big thermal buffer.
- Bury or semi-bury tanks: Even 30–40 cm of soil over or around a tank can knock several degrees off the daily peak.
- Insulate above-ground tanks: Wrap with foam, straw bales, cardboard plus foil, or even old blankets under a waterproof layer.
- Keep channels light-colored: White or very light PVC channels, lids, and covers reflect heat. Dark surfaces are nutrient cookers.
5.2 Nighttime radiative and evaporative cooling
If your nights are cooler than your days (which is true in many tropical highlands), use the night:
- Open vents or remove some covers at night to let heat escape from tanks and channels.
- If humidity is not extreme, run a small fan across a wet cloth or wick on the tank surface for evaporative cooling.
- In more advanced setups, a shallow “cooling pan” exposed to the night sky can be coupled to the main reservoir via a small circulator pump to bleed heat away.
5.3 System-level design tweaks
- Run nutrient from the coolest point (buried tank) through channels and return via gravity. Do not route pump exhaust through long sun-exposed pipes before it hits the plants.
- Prefer deeper films or shallow troughs in NFT during extreme heat so roots see more water volume and less temperature swing.
- Use plant spacing and canopy management to shade channels. A dense canopy over white channels is better than exposed plastic.
Step 6: Safe water treatment in remote or smallholder contexts
In the tropics, your water is often the vector for 90% of your long-term issues. Build treatment into your design from day one.
6.1 Basic solids control
- Install a simple screen or mesh filter ahead of your pump inlet to keep roots, leaves, and debris out.
- If using canal or dam water, add a small settling bucket or barrel where water rests for a few hours before entering the hydro tank.
6.2 Ultrafiltration (UF) + dosing
For more serious systems, a compact UF membrane filter (that retains bacteria and many pathogens) ahead of your nutrient tank is ideal. It gives you consistently clearer water and extends the life of your pumps and NFT inlets.
Combine UF with simple chemical dosing:
- Periodic low-dose hydrogen peroxide or peracetic acid to control biofilms.
- Occasional nutrient system sanitization between crop cycles.
6.3 UV disinfection
A small UV sterilizer in-line with your recirculation loop or make-up water can dramatically cut pathogen load without adding residual chemicals. In very remote farms, low-pressure UV lamps running off the same solar system (ideally through a small LFP buffer for stability) give a lot of protection for their wattage.
6.4 Monitoring EC and source water
- Measure EC of your source water before adding nutrients. If it is already high, you may need to dilute with rainwater or RO to avoid oversalting your system.
- Track EC and pH in the system 2–3 times per week minimum, daily in small reservoirs or during heat waves.

Section 4: Long-term reliability - wiring, protection, and benchmarks that actually matter
Robust DC wiring and protection in dust and humidity
Your hydroponic system sits in a wet, nutrient-rich, often salty microclimate. Treat electrics accordingly.
- Use proper cable: UV-resistant, appropriately sized DC cable, not random speaker wire. Oversize slightly to reduce voltage drop.
- Seal all connections: Use IP65 or better junction boxes, gland fittings, and heat-shrink butt connectors. Keep all joins above potential flood level.
- Fuse the panel and pump: Put a DC-rated fuse or breaker between panel and controller, and between controller and pump. Size it a little above operating current.
- Strain relief: Prevent cables from hanging off pump connectors or being tugged during tank maintenance.
Protecting pumps from clogging and dry run
- Mount the pump where it is always submerged, typically in a pump well or inside a perforated bucket in the reservoir.
- Add a coarse screen around the pump to catch roots and leaves before they hit the impeller.
- Schedule a quick weekly check: pull the screen, rinse biofilm and roots, and inspect the pump inlet.
- In NFT, design in a few extra feed points or short loops so one clogged take-off does not shut down an entire row.
Choosing when to use batteries (LFP) and how big
If you decide you must have night aeration or smoother operation during storms, do it with intent, not guesswork.
- Calculate your night load: for example, a 15 W air pump running 10 hours needs 150 Wh.
- Allow for depth of discharge and some cloudy days: a 12 V, 20 Ah LFP battery (about 240 Wh) gives a decent margin.
- Size the panel so that it can both run the pump by day and recharge the battery after a night’s use, typically 3–4× the night load in daily panel Wh.
Keep the battery and charge controller in a shaded, ventilated, splash-protected area. Avoid mounting them on hot metal walls or near steam vents.
Benchmarks: how to know your tropical solar-hydro system is dialed in
Once the system is running, stop guessing and track a few simple metrics:
- Nutrient temperature:
- Peak daily temp stays under ~28 °C most days.
- If you see 30+ °C regularly, add shading, insulation, or more volume.
- EC stability:
- With daily plain-water top-ups, EC should drift slowly, not swing wildly.
- Rising EC: too much evaporation or high-EC source water.
- Falling EC: plants are eating nutrients faster than water is lost, time to dose.
- pH behavior:
- Target 5.5–6.5 for most crops.
- Slow upward drift is normal with alkaline top-up water; correct gently with pH down.
- Flow and runtime:
- Check end-of-line NFT channels: the far end should never dry out during sun hours.
- In DWC, watch roots: bright white or cream with fine hairs means oxygen is adequate.
Tuning for Kenya-style smallholders and balcony growers
For a Kenyan smallholder converting part of a farm to hydroponics, or a balcony grower in a tropical city, a realistic path looks like this:
- Phase 1: Kratky + shade
- Use drums, buckets, or troughs with net pots and static nutrient.
- Focus on shading, EC/pH basics, and safe water sourcing.
- Phase 2: Add solar aeration or circulation
- Add a small 10–20 W DC air pump or circulator with a 30–60 Wp panel.
- Learn how your plants respond during heat waves and cloudy weeks.
- Phase 3: Step up to NFT / multi-bed DWC
- Now bring in NFT channels or linked DWC beds, and a 30–50 W DC pump on a 100–150 Wp panel.
- Integrate simple UF or better filtration, plus periodic peroxide dosing or UV.
This staged approach mirrors what is happening with solar irrigation in the field: start simple, use solar to remove the biggest bottleneck, then layer in more control only when you can manage it. As the Kenyan solar irrigation experience shows, reliable, low-operating-cost water delivery is what unlocks better nutrition and resilience, not shiny gadgets.
Get the fundamentals right - nutrient temperature, oxygen, water quality, and honest pump/solar sizing - and your tropical NFT or DWC system will behave more like a commercial greenhouse than a risky experiment, even when clouds and heat show up at the same time.

As an Amazon Associate, I earn from qualifying purchases.